Since this article was written, we have added support for leads, appointments, and other features integrated directly with LeadPerfection's API. If you're interested in learning more about how we can help you integrate your website for lead acquisition, SMS automation, and AI using LeadPerfection, please contact us for a demo here.
Introduction
Welcome to another comprehensive guide brought to you by HeavySet Tech! We will walk you through the integration of HeavySet Tech with the LeadPerfection CRM using a Webhook.
LeadPerfection is a CRM system designed to optimize lead management and conversion for home improvement businesses. Explore their innovative solutions and features at leadperfection.com.
Prerequisites
Before we jump into the integration process, ensure you have:
• An active HeavySet Tech account
• An active LeadPerfection account
• Basic understanding of HeavySet Tech and LeadPerfection interfaces
Step 1: Acquiring the LeadPerfection Webhook
Your journey to integrating these powerful tools begins with acquiring the LeadPerfection webhook. Reach out to LeadPerfection, and their dedicated team will provide a specific webhook for your account. Your unique webhook URL will look something like this: https://xxxx.leadperfection.com/batch/addleads.asp, starting with a 4-digit client code specific to your account.
Step 2: Configure the CRM Settings
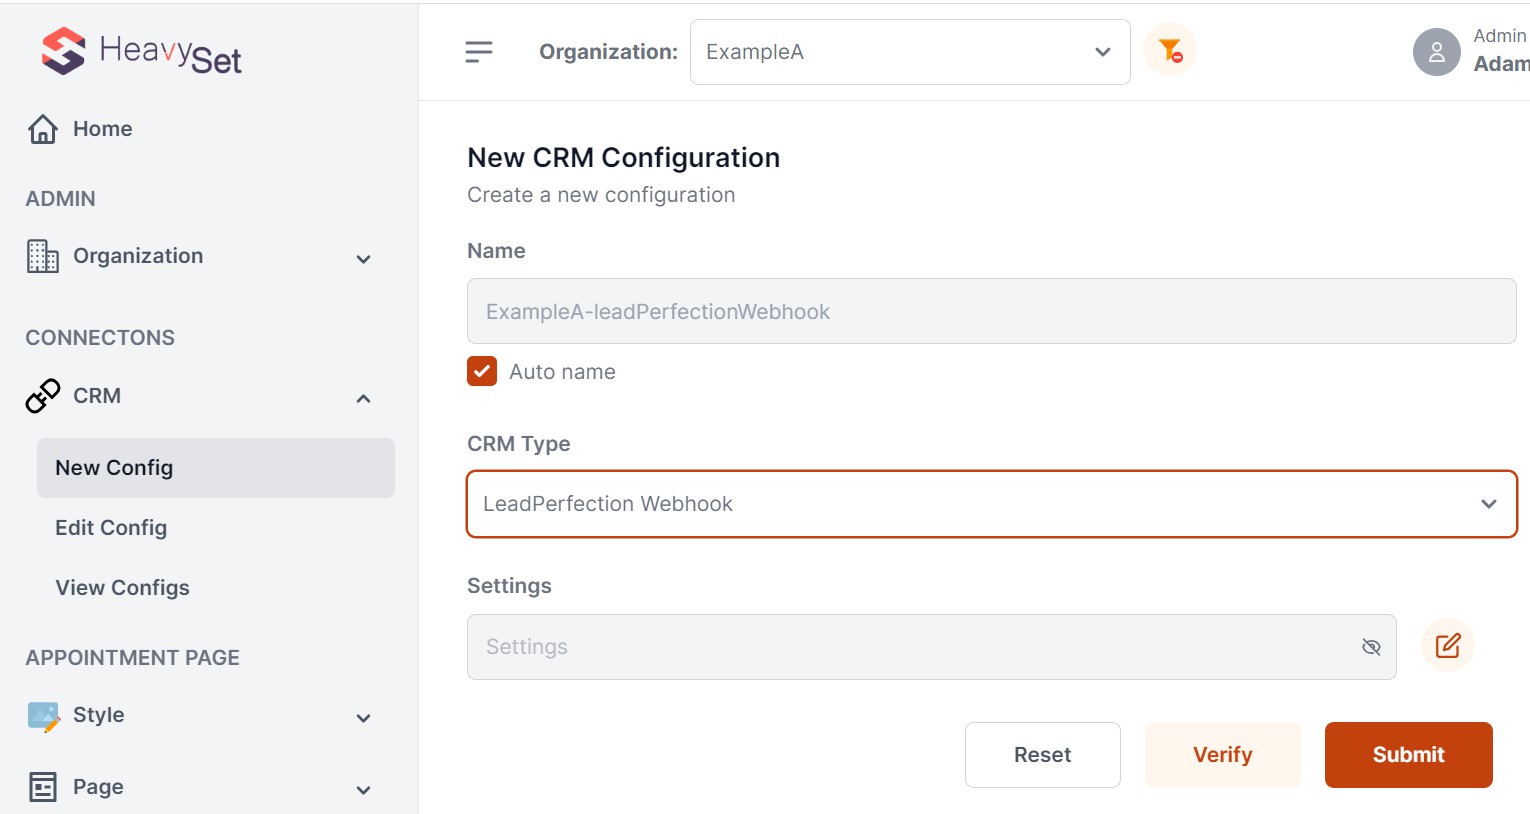
With the webhook URL at your disposal, it's time to proceed to HeavySet Tech. Navigate to CRM | New Config in the left menu. Configure the CRM Type to LeadPerfection Webhook.
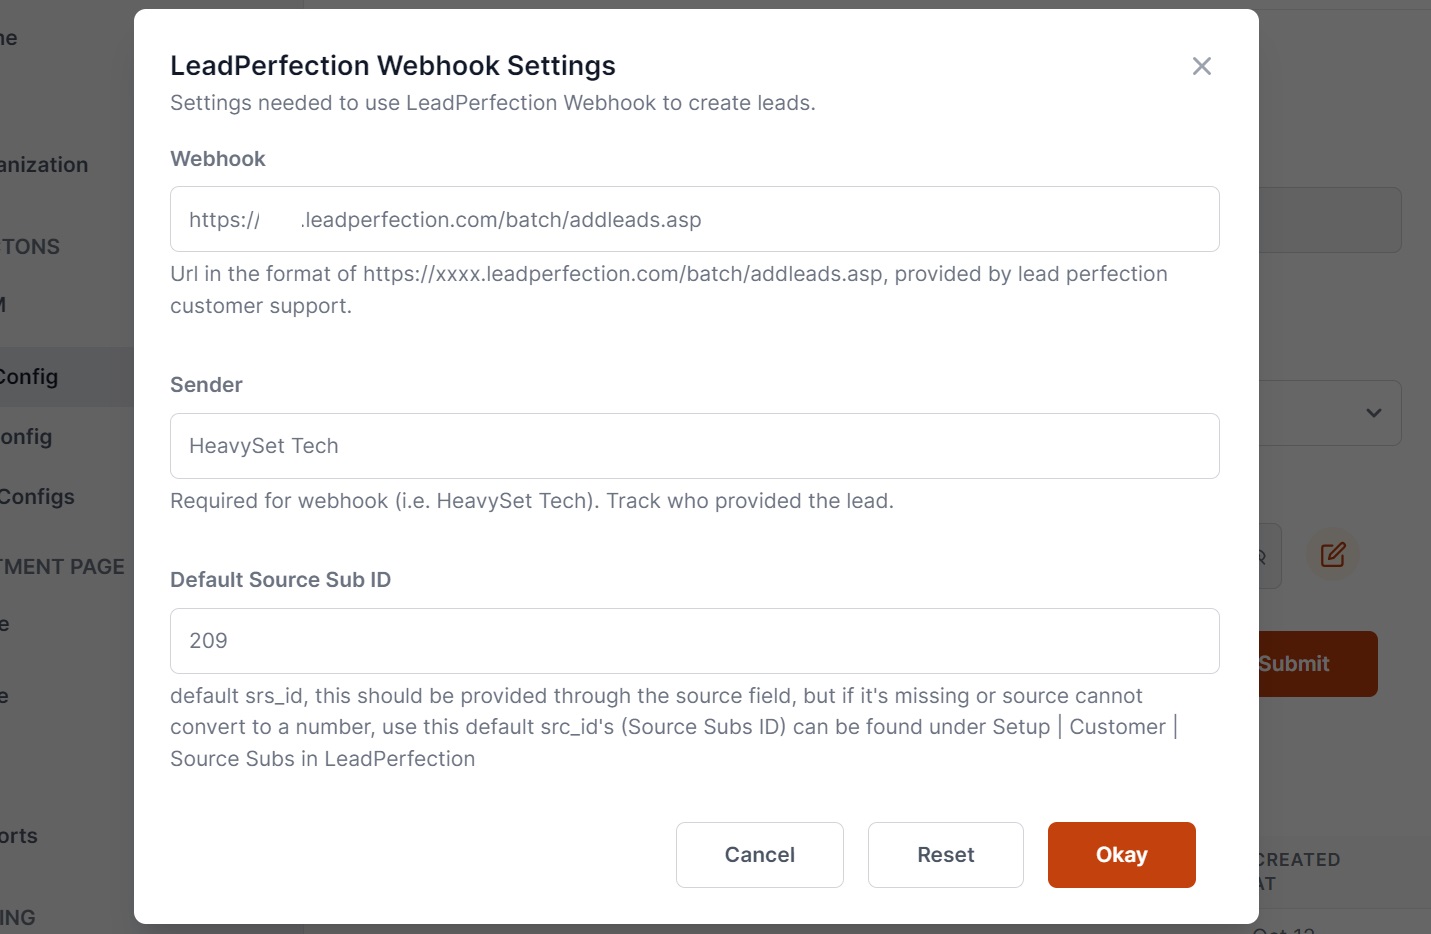
Click on the edit icon adjacent to the settings input box to open the settings dialog. In this dialog, you’ll need to input the Webhook URL and a Source Sub ID.
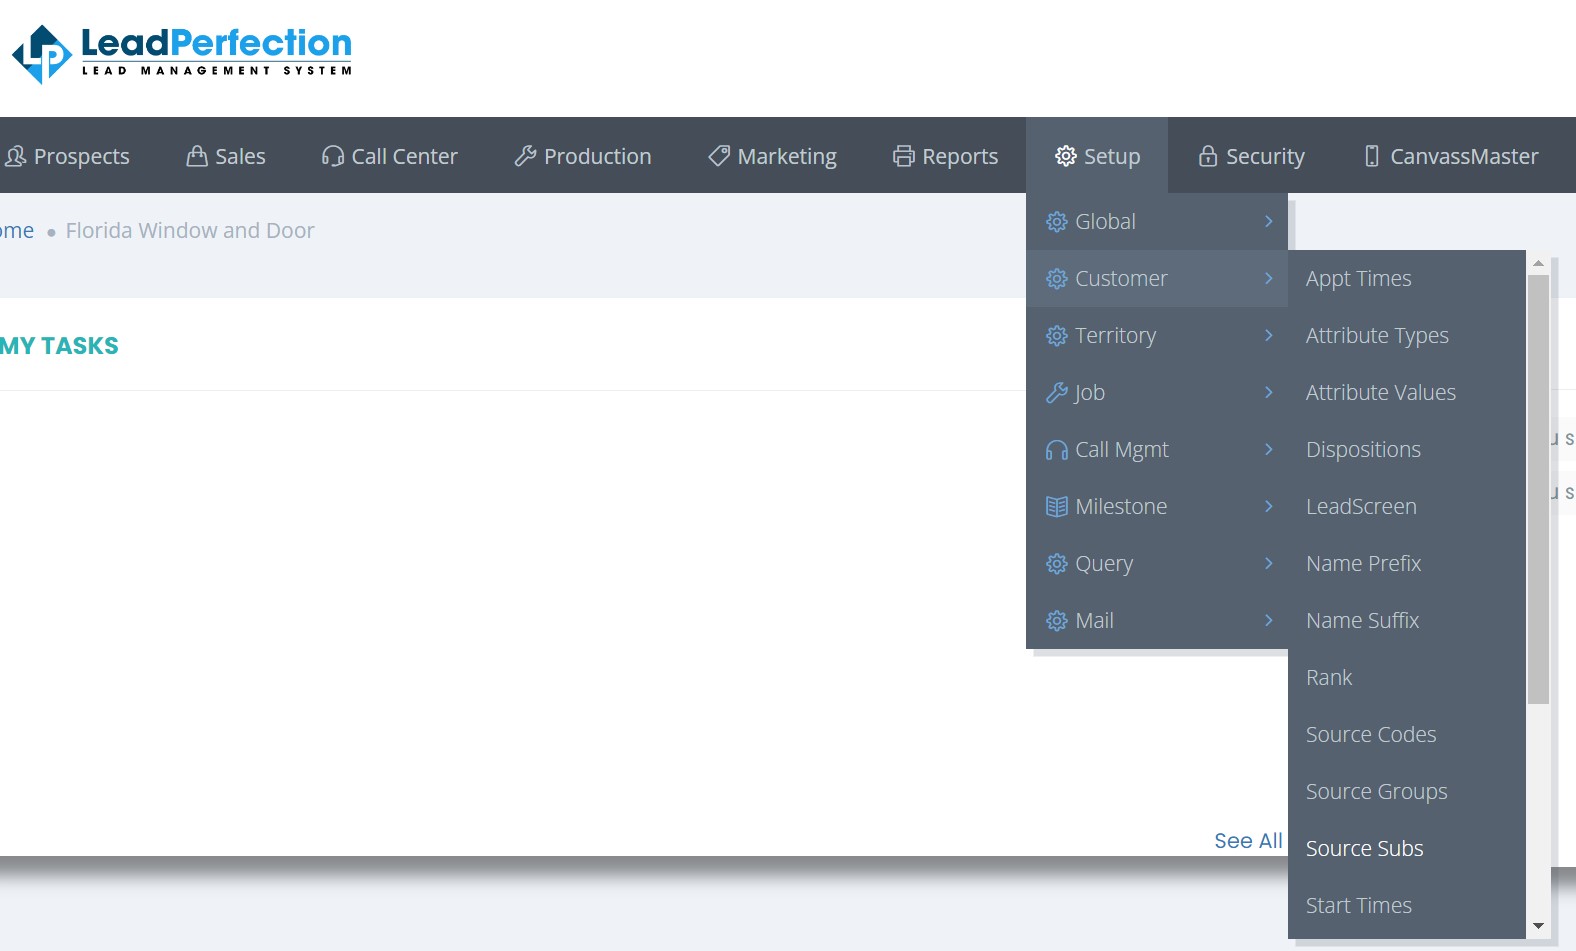
To find a Source Sub ID, go to LeadPerfection, navigate to Setup | Customer | Source Subs in the menu.
With all the details entered, click Okay and them click Submit. Remember, hitting the Submit button is essential to save your new configuration.
Step 3: Creating a New Page
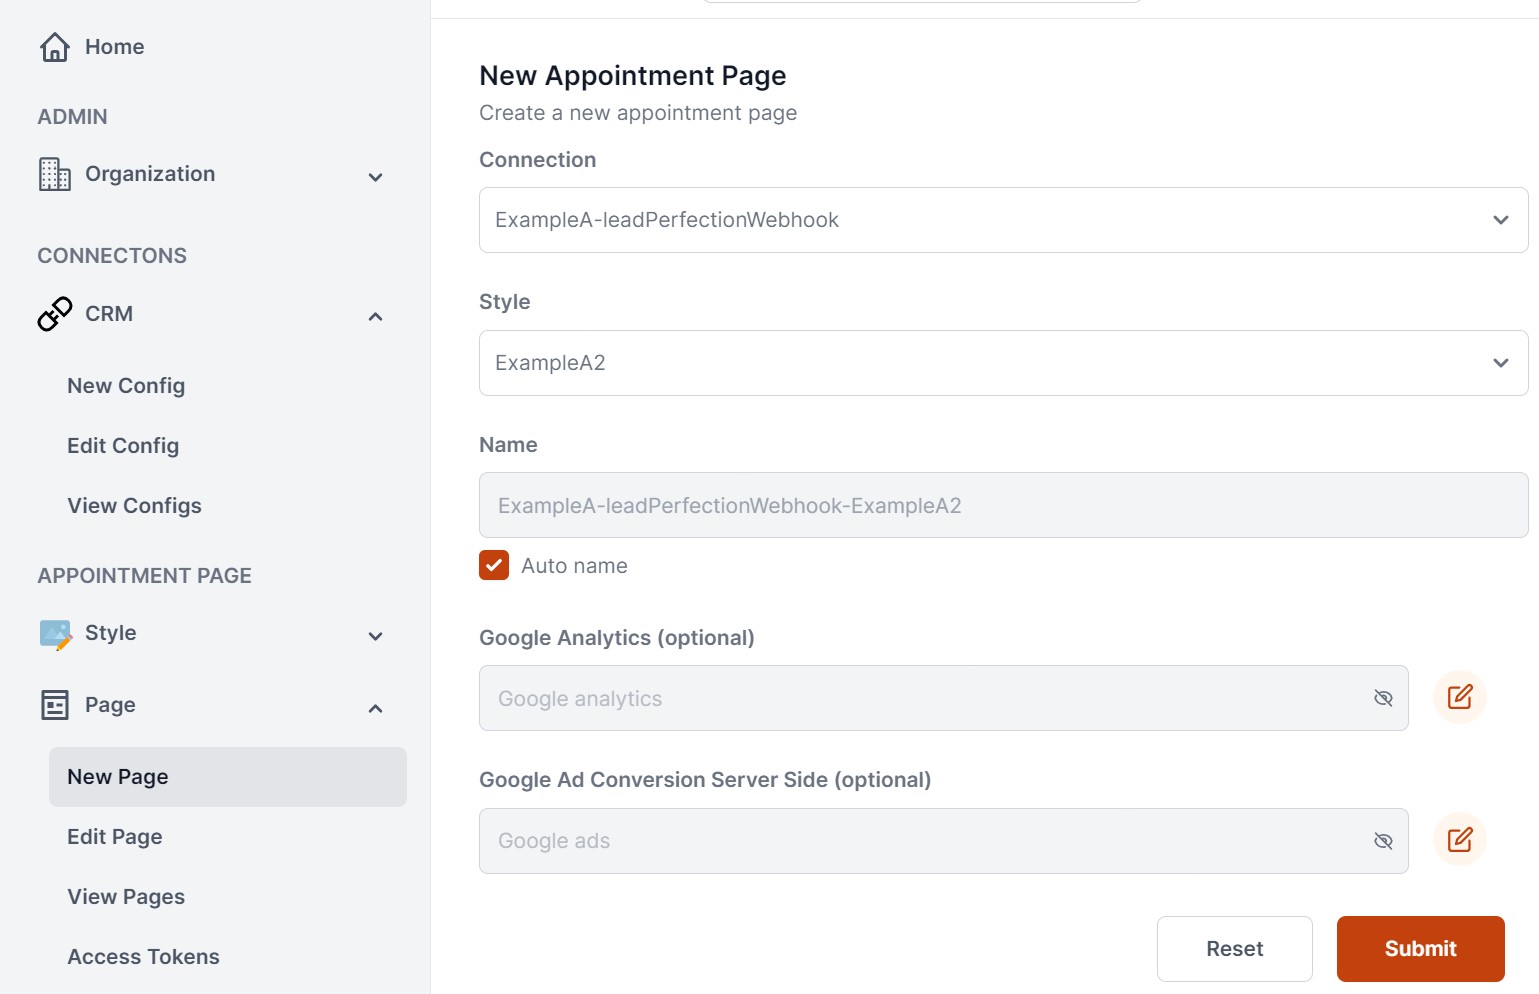
Now, let’s create a new page. Go to Page | New Page in the left menu, select the new Connection, and an existing Style. If you haven't configured a style yet, worry not! Just follow the comprehensive steps outlined in section 5 of our Setup Walkthrough guide here. Click the Submit button to save.
Testing the Page
In the next steps, we’ll ensure that the integration works and that leads are properly submitted to LeadPerfection via the configured webhook. Follow these intuitive steps to test the page:
Step 4: Access Tokens Generation
Navigate to Page | Access Tokens in the left menu. Locate the page you saved in the previous step and click on Generate Access Token.
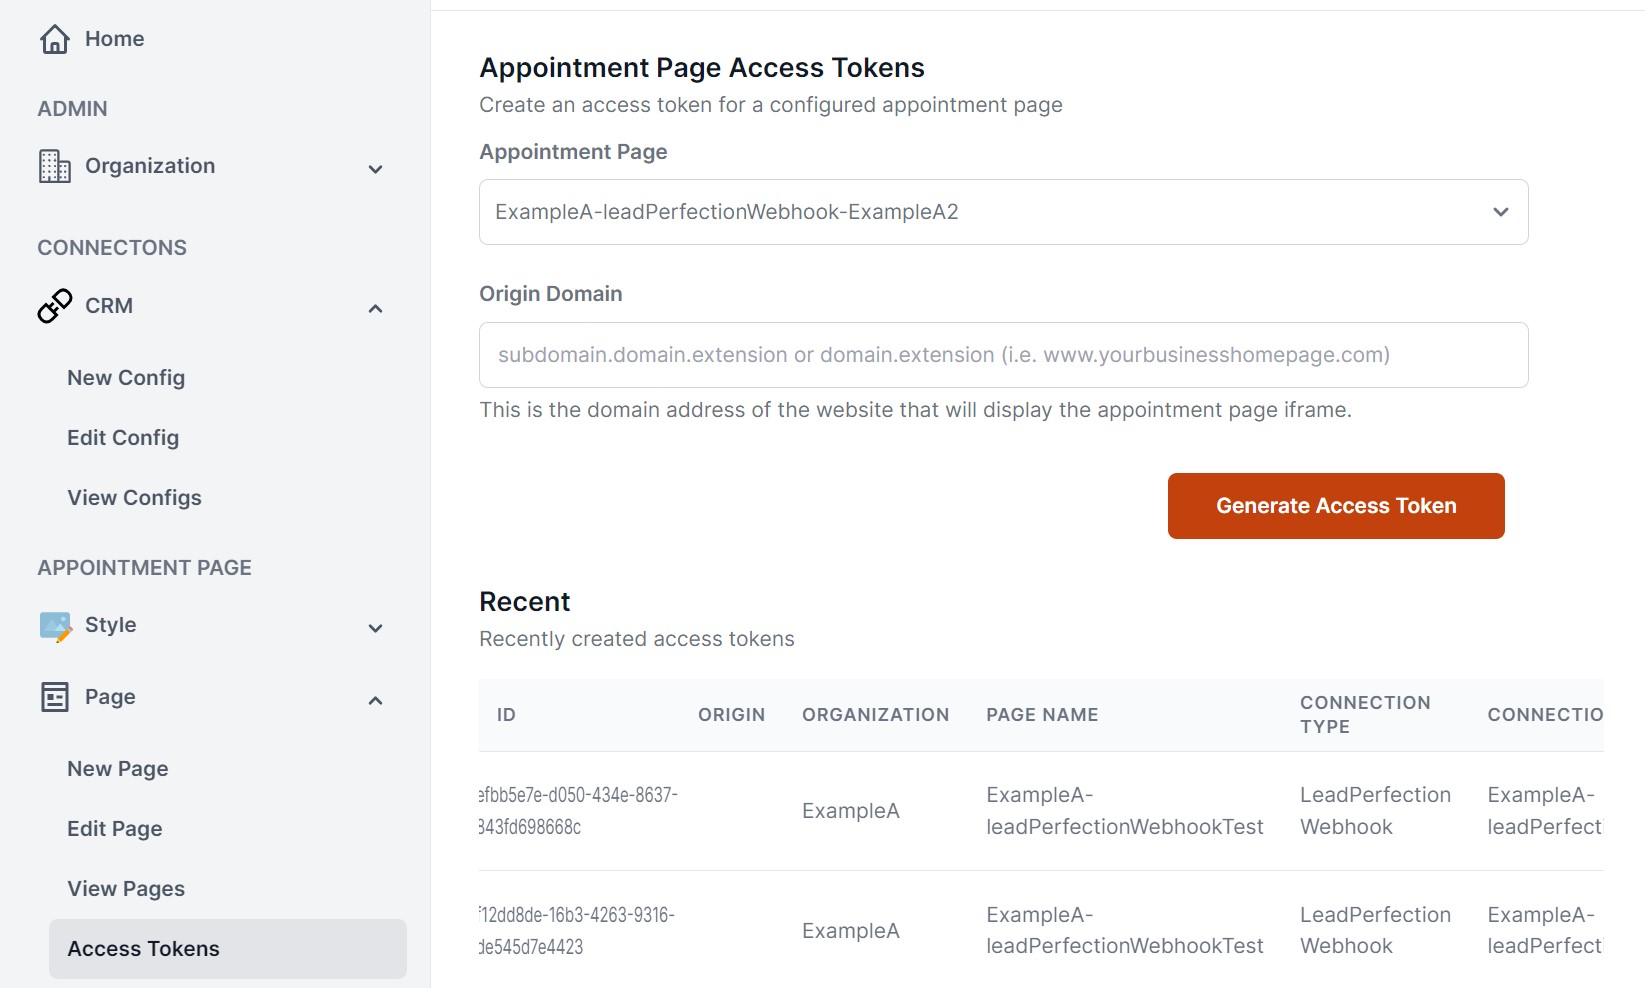
A live version of your page will be accessible. Click the Display Live Page! button to proceed.
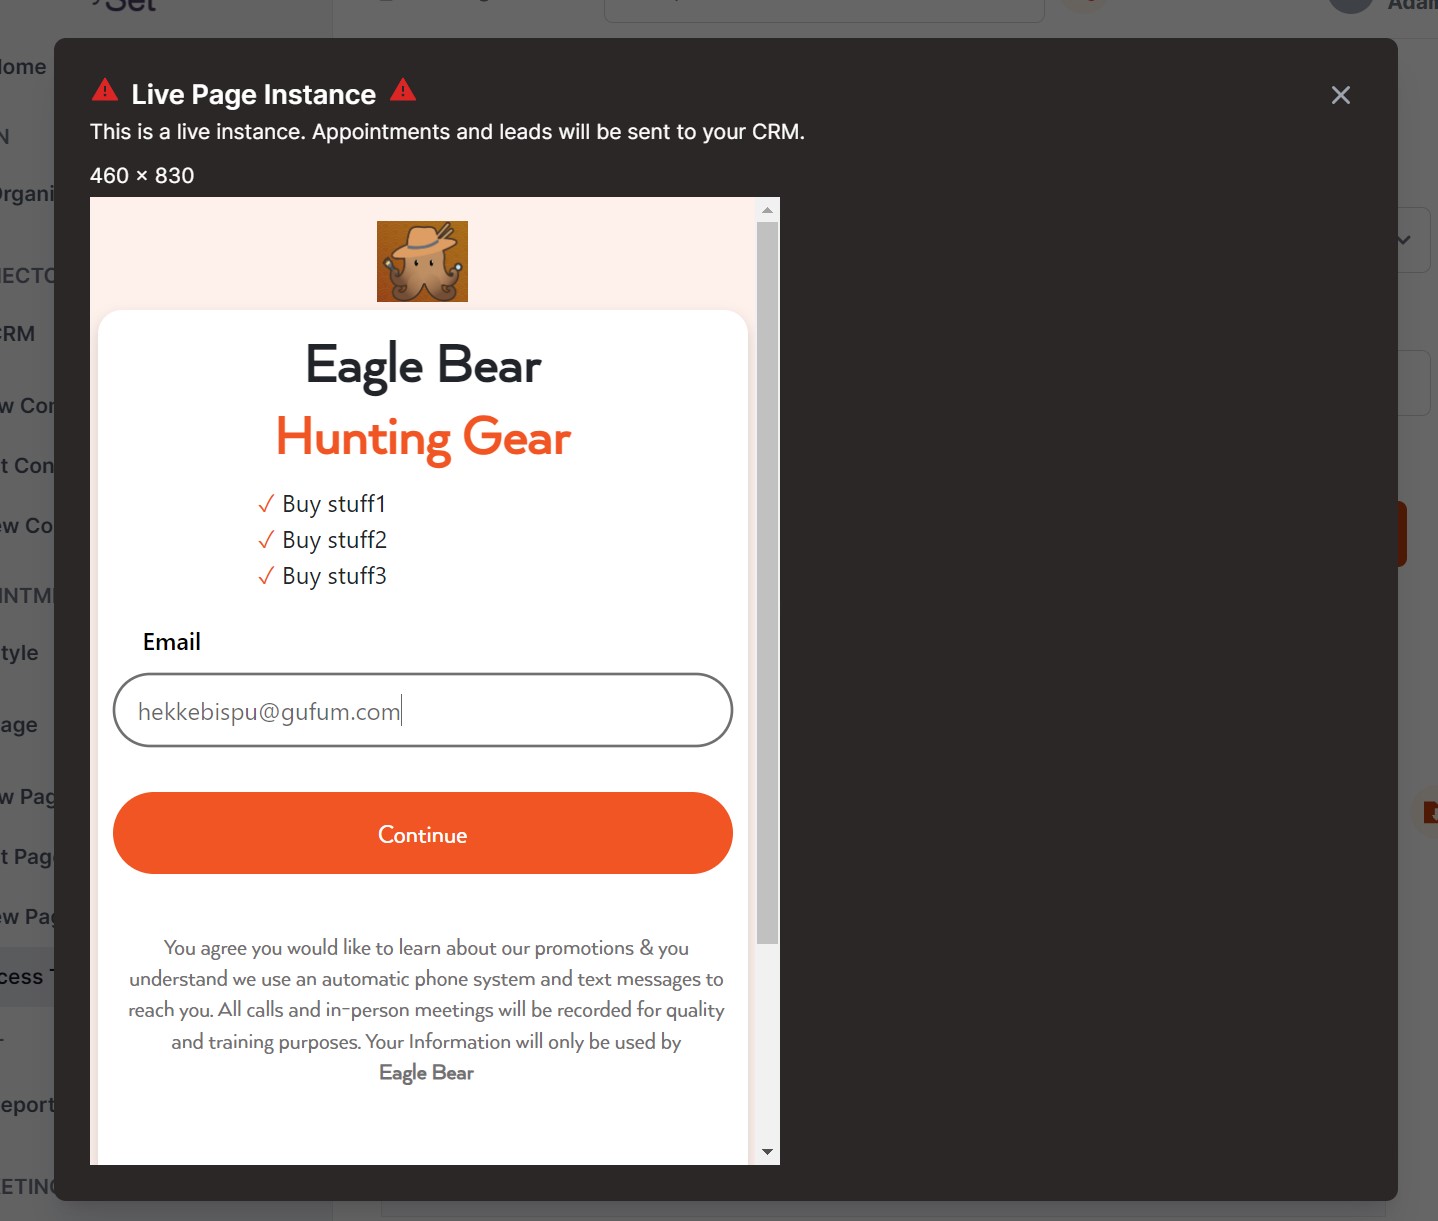
Step 5: Submitting a Lead
You’ll be prompted to enter an email address. We recommend using a throwaway email for this testing phase. Make a note of the email address used, as it will be used in the following steps. Click Continue
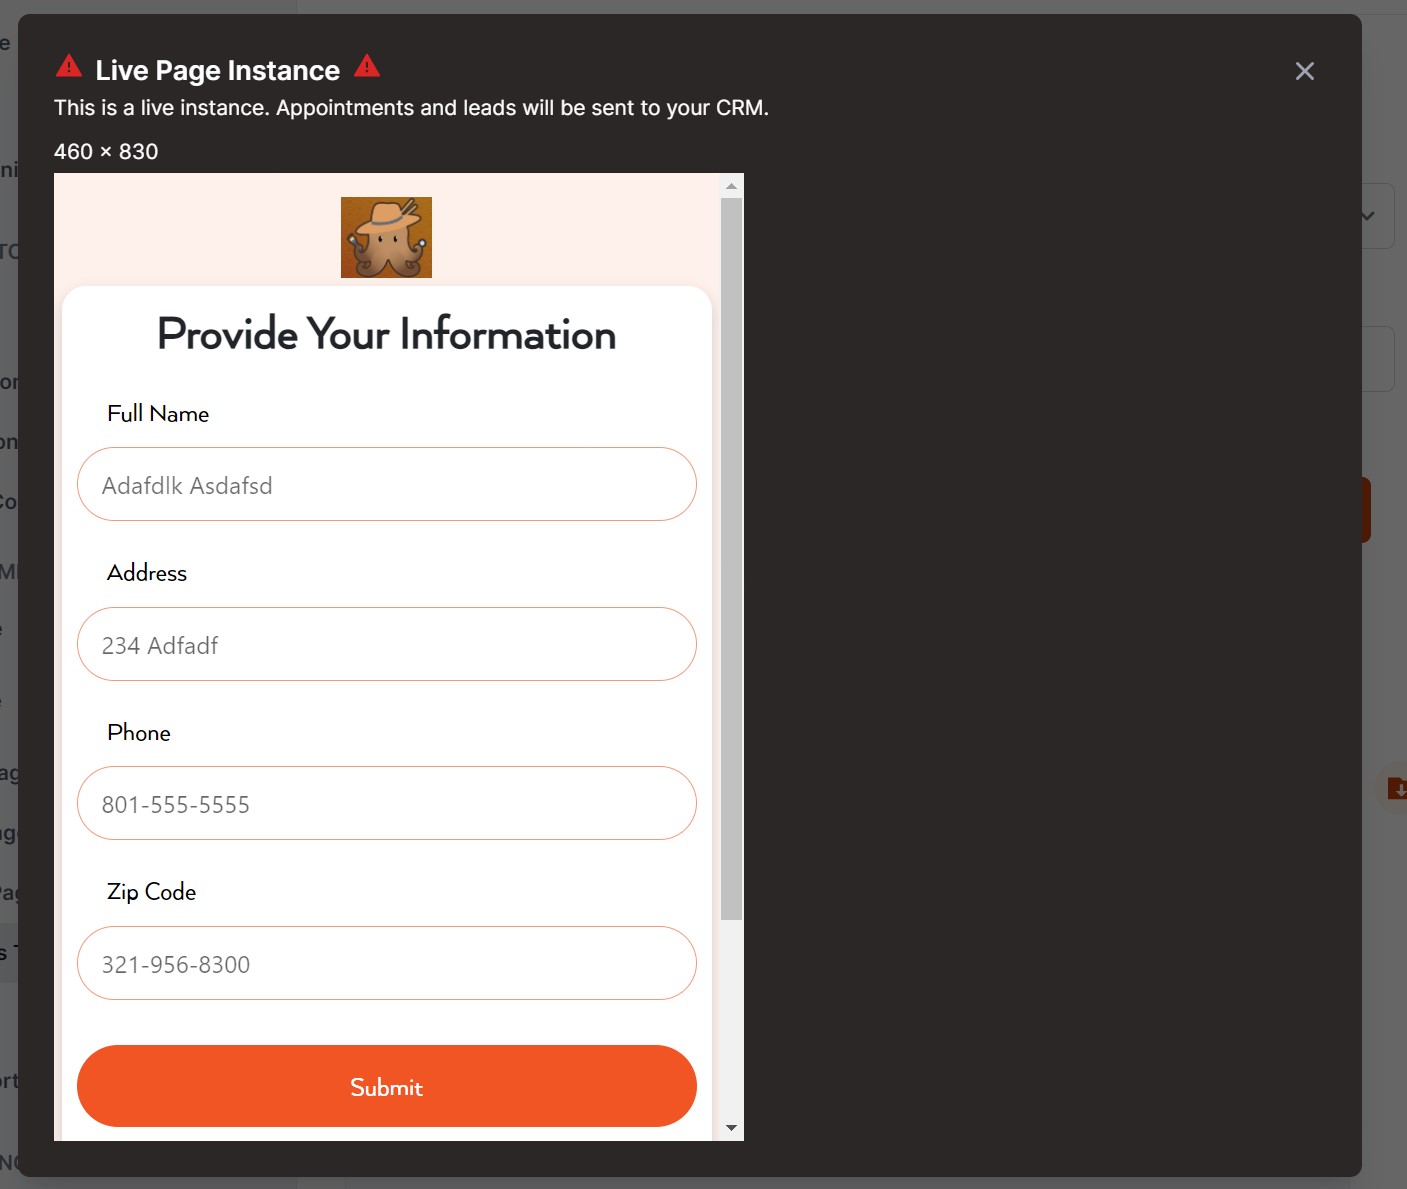
Complete the displayed form with the necessary information and click Submit.
Step 6: Confirmation Page
A confirmation page, adorned with the configured phone number and avatar from the style section, affirms the successful submission of the lead.
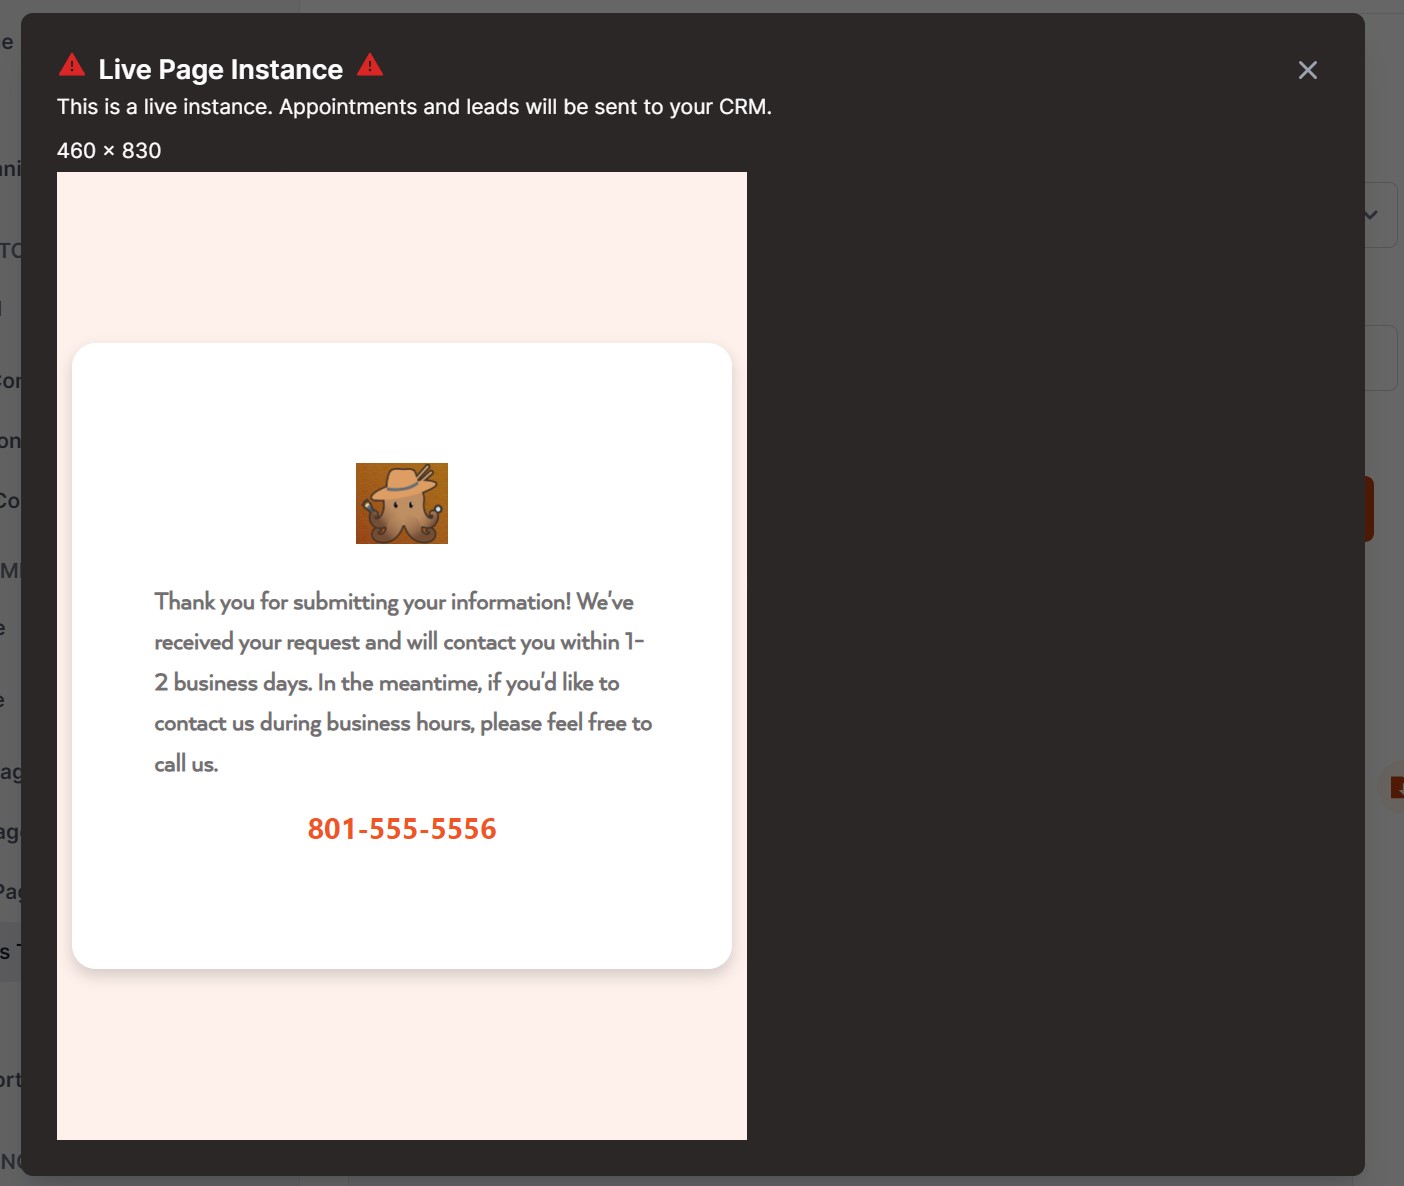
The lead is now stored in LeadPerfection. In the following steps, we will demonstrate how to locate and remove this entry to maintain database integrity during testing.
Locating and Removing the Newly Created Lead
In this segment of the guide, we will meticulously walk you through the steps to locate and eliminate the newly created lead from LeadPerfection.
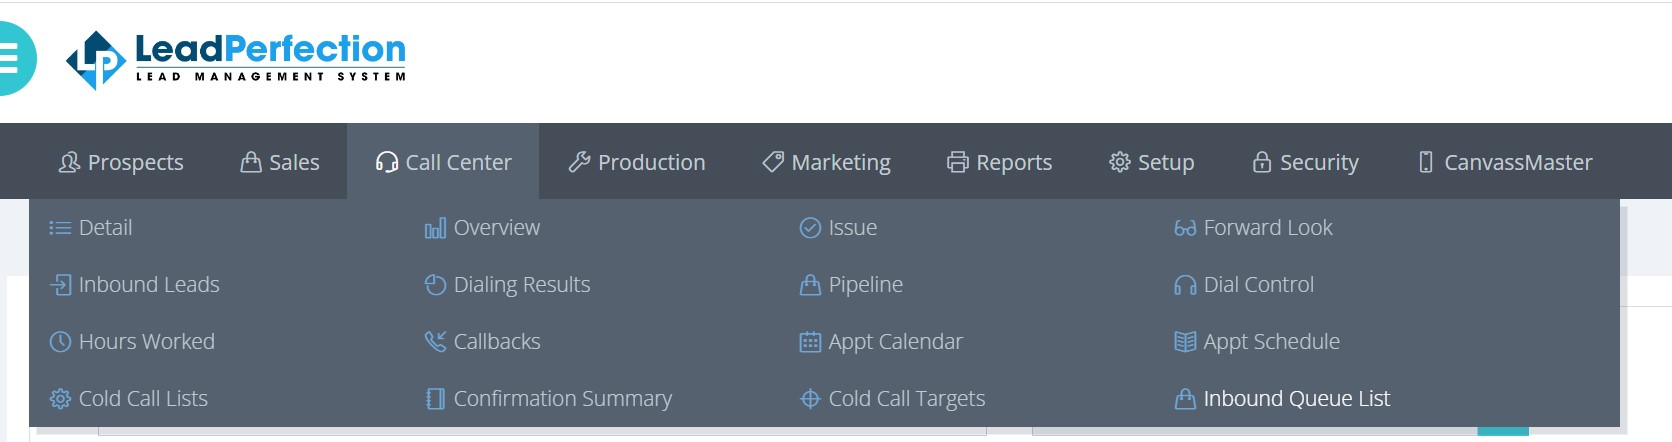
Step 7: Navigate to the Inbound Queue List
Begin by logging into your LeadPerfection account. Hover over the Call Center menu and select Inbound Queue List. If the Inbound Queue List option isn’t visible, you may be able to enable this menu item by navigating to Security | User Access | Assign column.
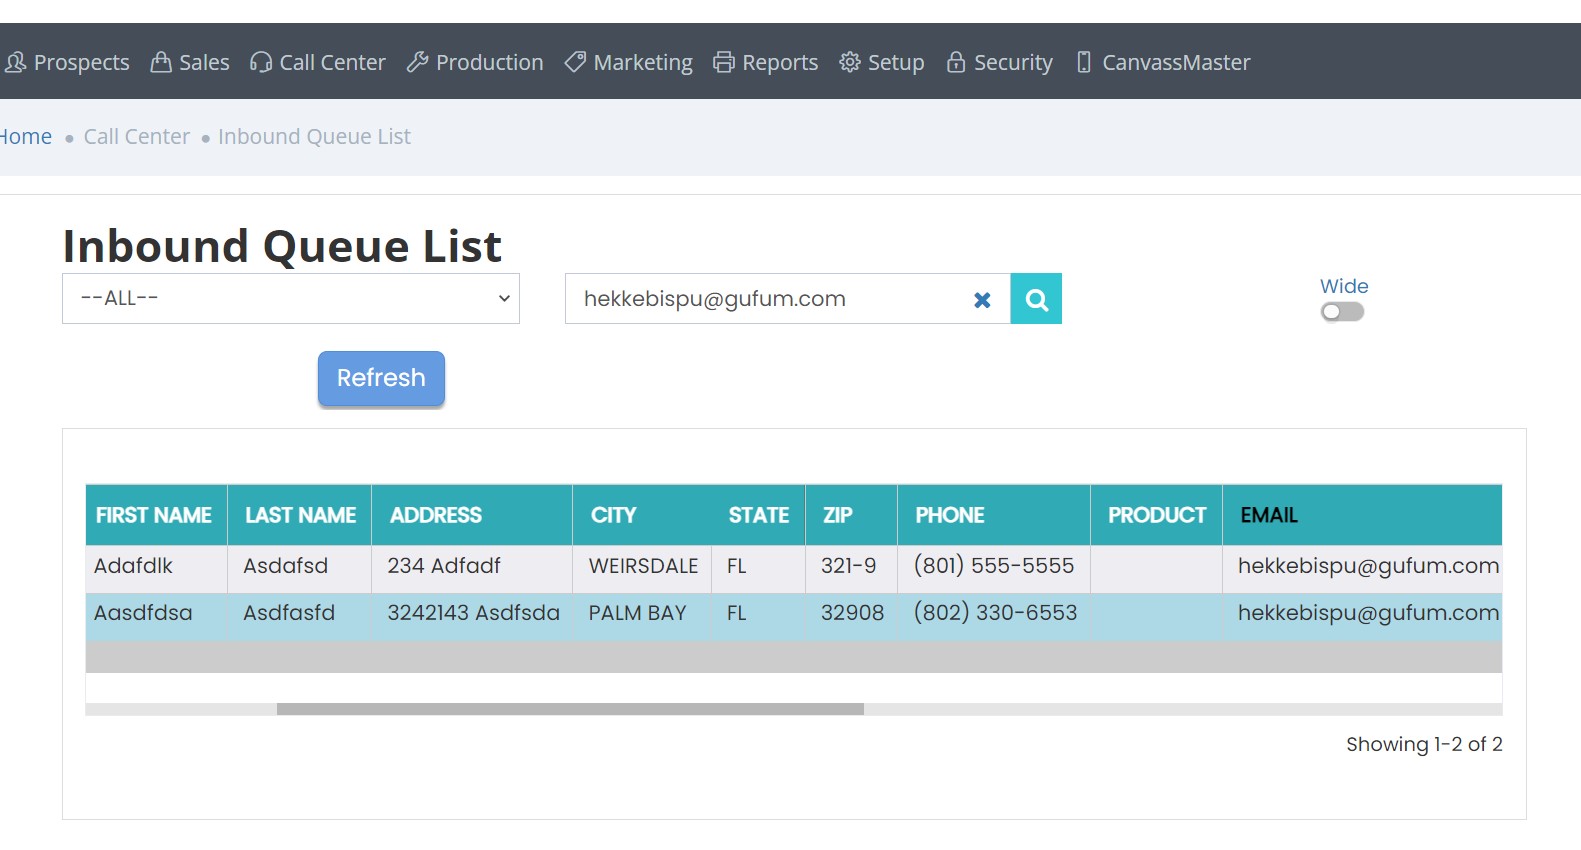
Step 8: Searching for the Lead
Within the Inbound Queue List, look for the EMAIL label at the top of the EMAIL column and click on it. Input the email address you noted earlier into the search box and hit the magnifying glass icon to initiate the search.
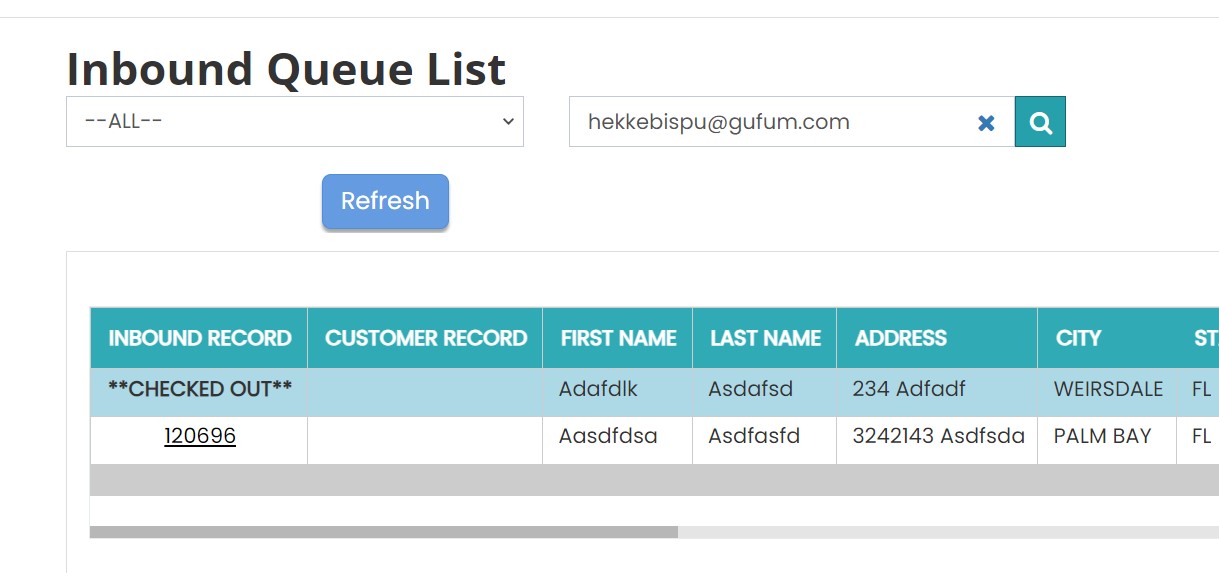
Step 9: Accessing the Lead Details
Your search results will populate a table below. Look for the underscored record ID in the first column and click on it.
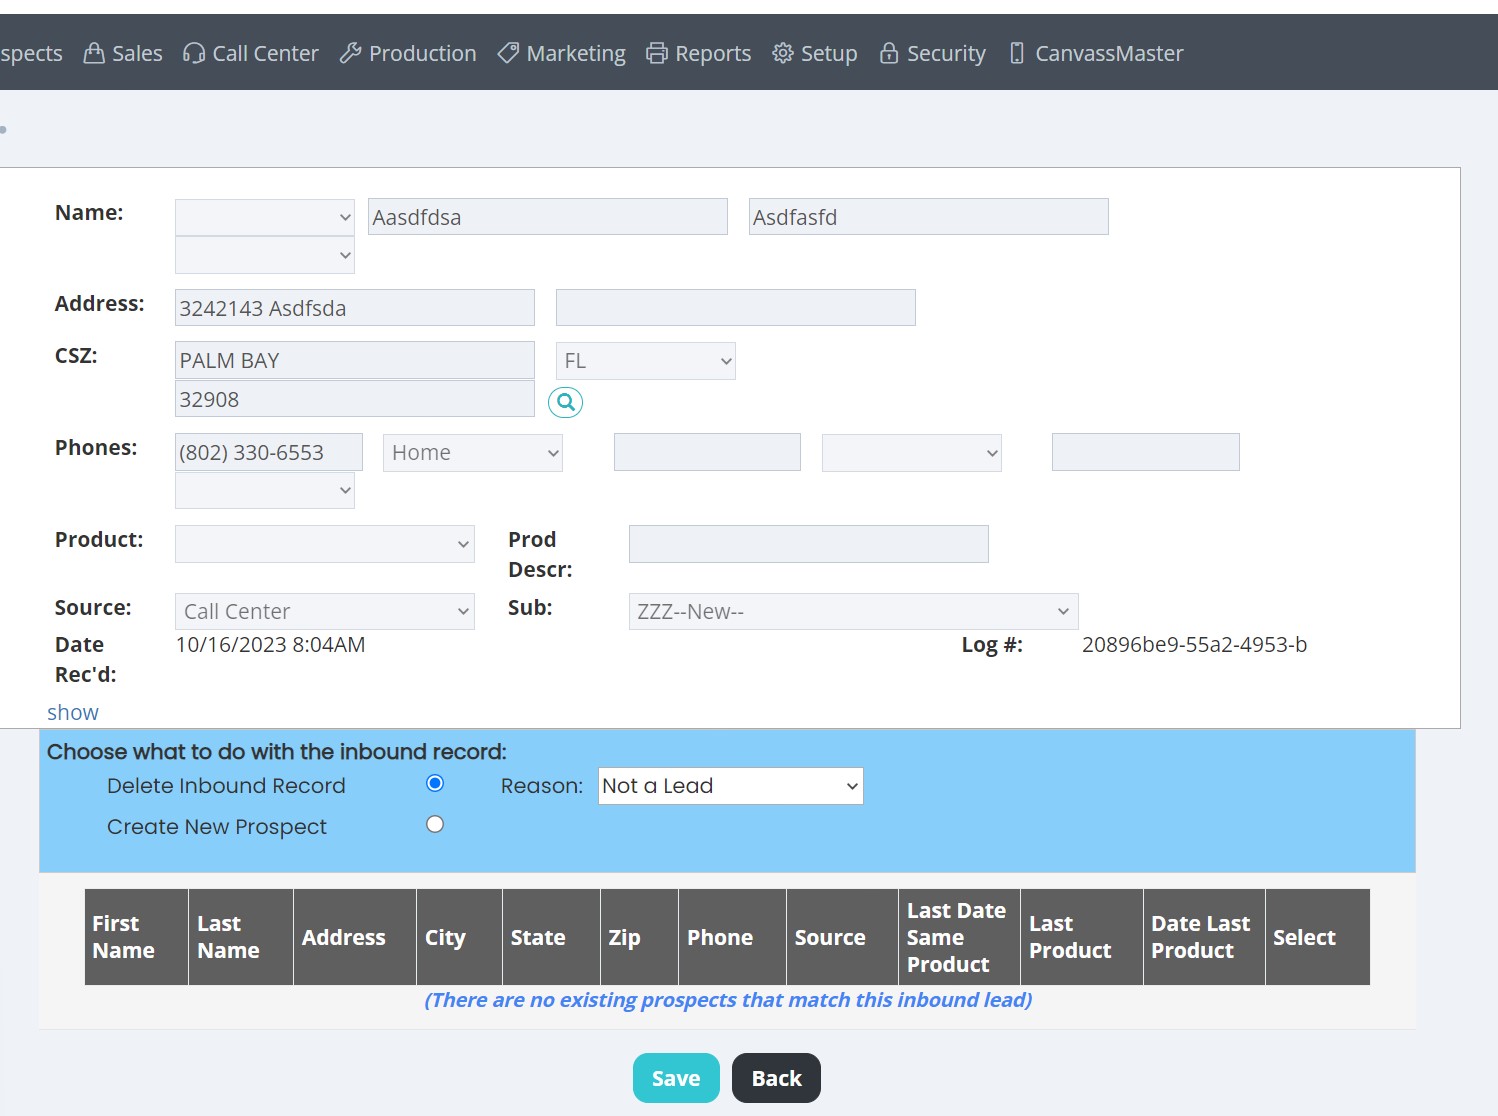
Step 10: Editing and Deleting the Lead
You will be directed to a detailed page featuring inputs for the newly created lead. Hit the Edit button. Once in edit mode, click the Done button. A blue box will emerge, offering an option to Delete Inbound Record. Select Not a Lead from the provided options and hit the Save button to remove the lead from the system.
Conclusion
This concludes our detailed walkthrough on the integration and testing of LeadPerfection with HeavySet Tech via the Webhook option. For additional information and detailed steps, especially on generating an iframe for your website, refer to our Setup Walkthrough Guide (Step 7). Our support team is available for any further assistance you may need.
About Heavy Set Technologies LLC
Since our launch in 2023, Heavy Set Technologies LLC has empowered businesses to integrate appointment scheduling directly into their websites. We've now expanded our platform to include powerful AI-driven SMS and email automation—enabling clients to seamlessly capture leads and nurture them through effortless bookings and follow-ups, all under one roof.
Learn more about what we offer and explore our services at heavyset.tech.