Introduction
This guide will walk you through how to get your Facebook Pixel ID and Access Token from Facebook Business Manager. Then, it'll show you how to save these values in your HeavySet Tech account. Once that's done, you'll be able to trigger Facebook events whenever someone submits a lead or appointment through your Heavyset form.
How to Get Your Facebook Pixel ID from Facebook Business Manager
To start tracking events with Facebook Pixel, you'll need to get your Pixel ID from Facebook Business Manager. Follow these steps to find it:
Log in to Facebook Business Manager: Go to business.facebook.com and log in with your account credentials. If you don't have an account, you'll need to create one.
Navigate to Business Settings: In the top left corner, click on the menu icon (☰) and select "Business Settings" from the dropdown menu.
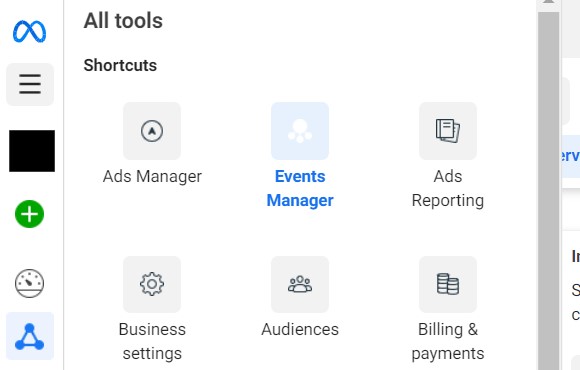
Go to Data Sources: On the left-hand side menu, click on "Data Sources" to expand it, then select "Datasets."
Select Your Pixel: If you already have a Pixel set up, you'll see it listed here. Click on the Pixel you want to use. If you don't have a Pixel yet, click on "Add" to create a new one and follow the prompts to set it up.
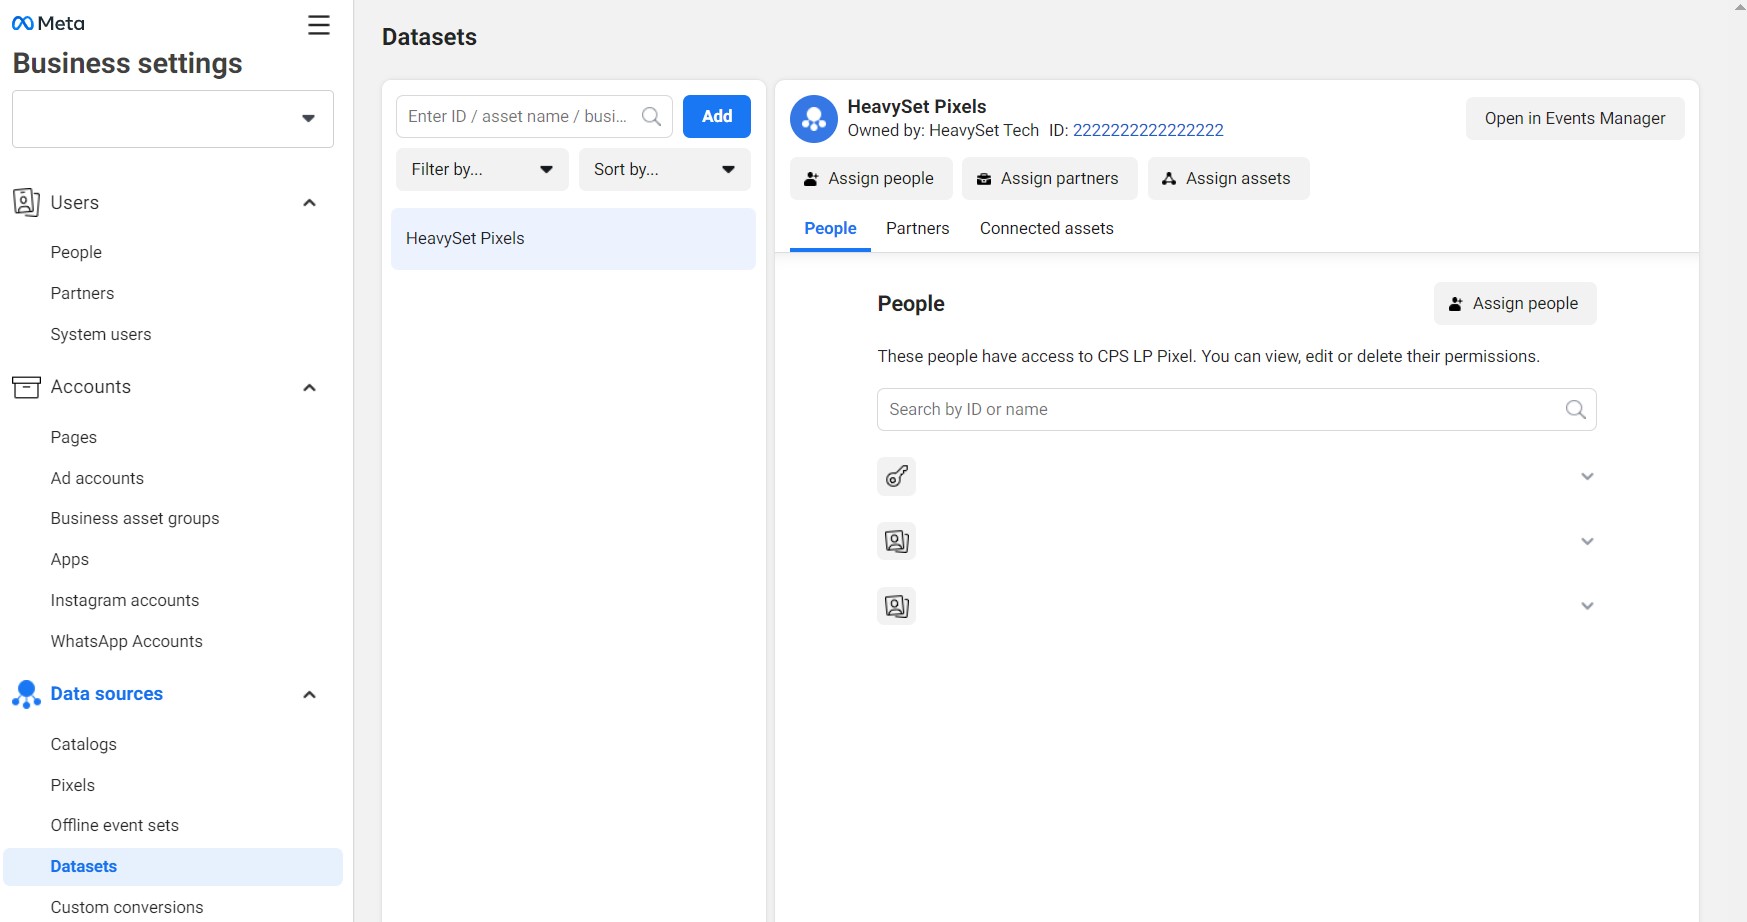
Copy Your Pixel ID: Once you've selected your Pixel, you'll see the Pixel ID under the name of your Pixel. Copy this ID; you'll need it for the next steps in setting up your Heavyset.tech account.
How to Get the Access Token for the Facebook Conversions API
Once you have your Facebook Pixel ID, the next step is to obtain the Access Token for the Facebook Conversions API. This token allows your HeavySet Tech forms to send event data to Facebook. Here's how to get it:
Log in to Facebook Business Manager: Go to business.facebook.com and log in with your account credentials. If you don't have an account, you'll need to create one.
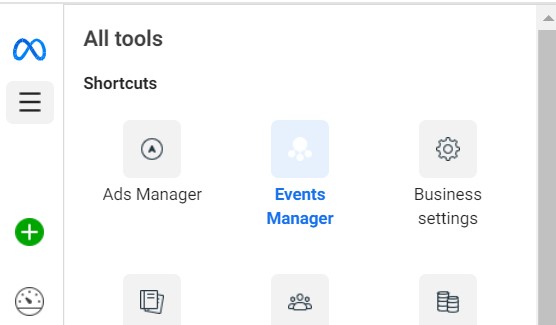
Navigate to Events Manager: In the top left corner, click on the menu icon (☰) and select "Events Manager" from the dropdown menu.
Select Your Pixel: In the Events Manager, you will see a list of data sources. Select the Pixel you want to use for the Conversions API.
Go to the Settings Tab: Once you've selected your Pixel, click on the "Settings" tab.

Generate Access Token: Scroll down to the "Conversions API" section. Here, you'll see an option to "Generate Access Token." Click on this button.
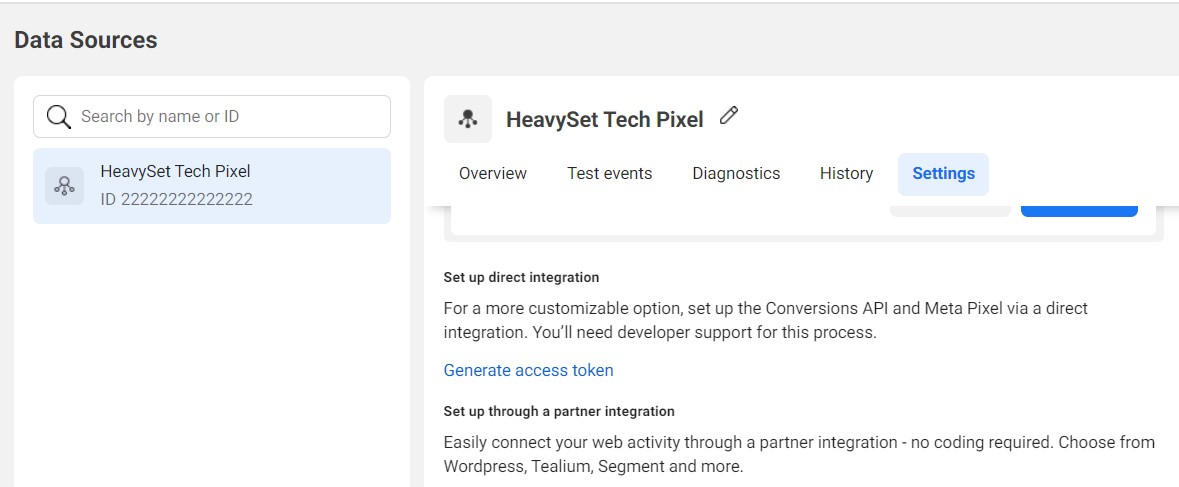
Copy Your Access Token: A new window will appear with your Access Token. Copy this token and keep it secure, as it will be used to configure your Heavyset Tech account.
How to Save Your Pixel ID and Access Token in HeavySet Tech
Now that you have your Facebook Pixel ID and Access Token, the next step is to save these values in your HeavySet Tech account. This will enable Facebook event tracking for leads and appointments submitted through your Heavyset forms. Follow these steps:
Log in to Heavyset.tech Admin: Go to admin.heavyset.tech, and log in with your admin credentials.
Navigate to the CRM Settings: Once logged in, go to the Edit Config page for your CRM. Click the Facebook Conversions button underneath Email Settings.
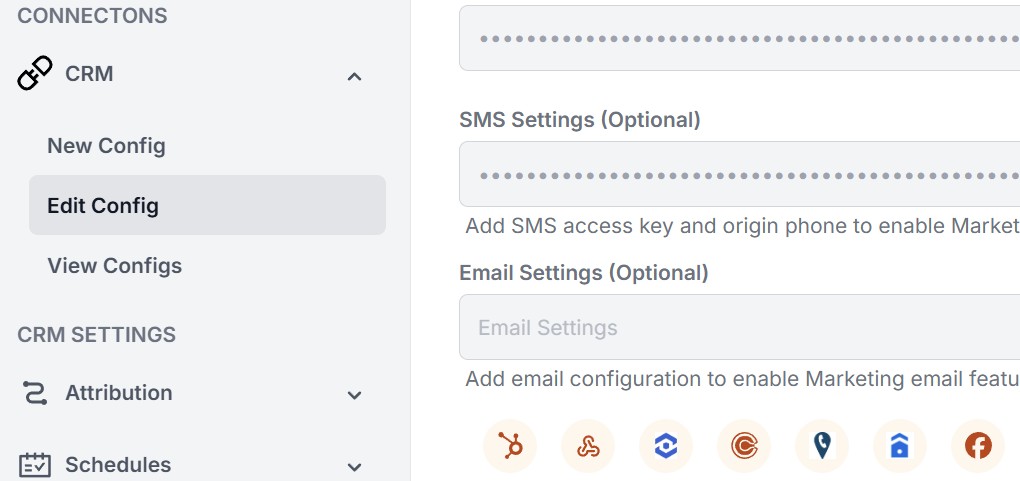
A popup will appear where you can configure your settings.
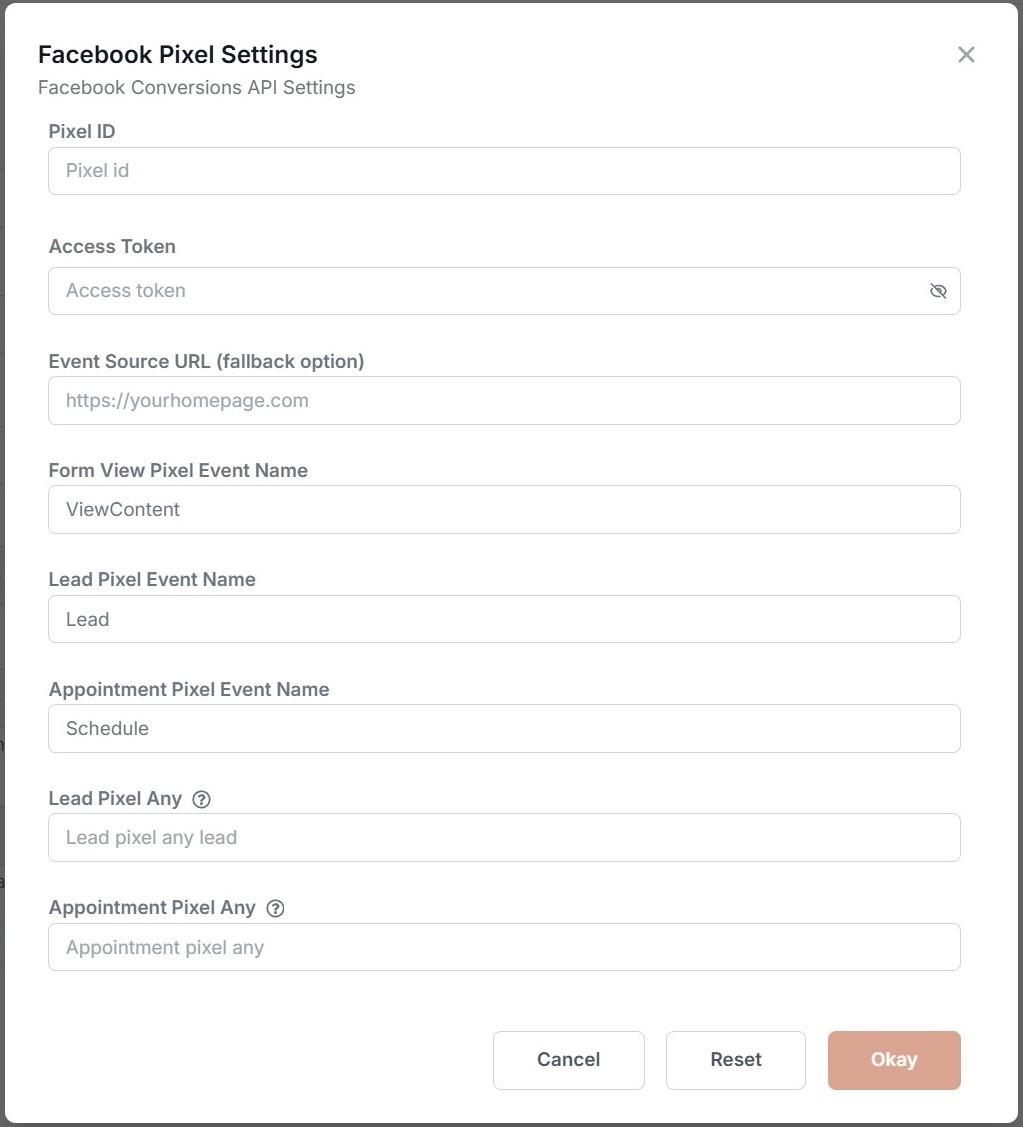
Enter Pixel ID and Access Token: In the modal window, you will see fields to enter your Facebook Pixel ID and Access Token. Copy and paste these values into the respective fields.
Enter the Event Source URL: Enter the Event Source URL, which is the URL that your Facebook ads direct users to. This helps Facebook know where the events are coming from.
Update Names: You can update the names for Form View Pixel Event, Lead Pixel Event, and Appointment Pixel Event.
Lead and Appointment Pixel Any: Send a Facebook pixel event for all leads and/or appointments in CRM, not just Facebook leads/appointments.
Save the Settings: Click the "Okay" button to confirm your entries, then click "Submit" to save your changes.
NOTE: HeavySet Tech will query the CRM for leads with the text "facebook" in the source, and if found, they will send pixels for those leads that did not use the form.
Facebook Events Audit Table
Navigate to the Facebook Events Table: Under the Audit Section, open the Reports menu and click Facebook Events.

Here, you can search and filter through any records based on the Event Name, Email addresses, phone numbers, and ZIP codes.
Conclusion
By following these steps, you will have successfully integrated Facebook Pixel with your HeavySet Tech forms. This integration allows you to track and analyze user interactions, providing valuable insights to optimize your marketing efforts.
